Monday, July 14, 2014

No Sew Window Valance

Last week I asked which valence people preferred. 

Valence 1
Or Valence 2
Honestly, I already had a favorite, but I guess I just needed confirmation on my decision. Valence 2 was the overwhelming favorite of those who let me know which they preferred. Yay! That's the one I wanted!

This is a quick sketch of my measurements I decided on for the finished product. 

I like to sew, but I wanted to do this project as a 'No Sew' project.  That way even those who don't like to sew, or can't sew, can do this valence. 

First thing you will need to do is gather all your supplies. 

  • Material
  • Iron and ironing board
  • Fabric pen (chalk works too)
  • Pins (for holding fabric in place)
  • Fusible bonding web
  • Spray bottle and press cloth
  • Straight edge
  • Velcro or something similar

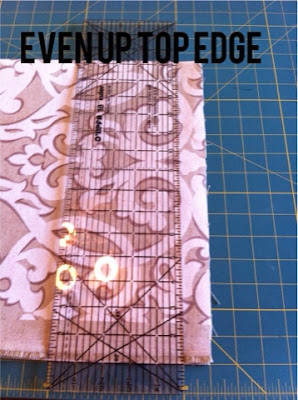
Starting with my printed fabric, I needed to make sure I had a straight edge on the top.  Especially since my fabric had a definite pattern that could have turned out wonky very easily. 
Next, finding center was important. 1. For the pattern and 2. To make sure it would be long enough to cover the width of the window.
Next step is to mark your lines. If you don't want to purchase a fabric pen, white school chalk works just as well. It can be found in the kids' art section at Walmart for less than a dollar. 
I decided to mark the actual dimensions for the finished valence on the fabric. I then went back and marked the seam allowance lines. This just helped me keep everything in order in my mind. (I have so many distractions and interruptions, I have to do projects in a way that I don't have to think to hard about what I've already done.)
Next step is to cut out the top piece along the seam allowance lines. 
Now that the top decorative piece is cut out, go back and mark and cut out your bottom fabric.
Once both pieces are cut out, it's time to put it all together. I used Fusible Bonding Web 5/8th" wide to do all the seams and to 'sew' the fabric together.
Follow the directions on the back of the package. This will ensure you don't scorch your fabrics and that the bond holds properly. First seams to press are the point of the top fabric.
Next, put put the two fabrics together in the proper position and pin in place.
Once it's positioned and pinned, bond the two fabrics together along the point edge.
The back will sag if left unattached at the top edge. Looking back, I should have had the solid fabric go all the way up to the top seam of the decorative fabric. Something I'll do differently next time, but didn't have enough fabric to correct it this time.
Next, I did a quick hem along the top of the valence. Try to keep this as straight as possible so it will look right when you hang it on your window.
Now, do the same for the bottom hem and sides.

Your next step will be to add a liner. I didn't plan on this when I first started. Fortunately, I had enough of an other material left over from previous project that was big enough. I just laid the liner fabric on the the back of the valence, pinned it in place and then cut the liner fabric about 1/2 inch smaller than the valence front. Last step to this part was to fuse the top edge together. 
The next steps will be a little different for everyone depending on how you will hang the valence. I have a decorative piece that snaps on to the front of the blinds that are already installed in the window.

Here is what I did. 

The middle of your valence needs to line up with the middle of your window. Find the middle and mark on both. 
Attach the top of the valence to the blind cover with self adhesive hook and loop. I had a moment of panic when all I could find was sew on, but I just had to dig a little deeper in my stash of supplies to find the right stuff. {Phew!!}
Last step is to snap it in place and just stand and look at your finished project!

I love the way this looks in the room and dresses up the space! I'm trying to get my home to look like it actually has a family living in it. It's taken me a while, but after almost six years it's about time. Hopefully, now that I've started we won't be selling anytime soon. 

Let me know what you think! If you have any questions, I'll be happy to try and help. Just contact me through Facebook or email. This really was an easy project. The biggest time spent was in the planning and getting all the measurements right. 

Ok.  Now on to the next project!

Monday, July 7, 2014

Independence and Basic G

I hope you all had a great Independence Day weekend!  I think this is one of the first times we didn't travel anywhere for the holiday.  It was great to spend the time at home with some new friends making memories.  Our kids are now pyromaniacs after Friday night and we only had one very minor burn.

The whole idea of 'independence' got me thinking about life and my kids.  I'm not one of those people who wants their kids to stay little forever.  I LOVE that my kids are getting older and more capable day by day.  Having five kiddos in less than seven years can be very overwhelming.  Every time one of them grows to be a little more independent, I do a little happy dance - not only for myself, but for them.

These little steps they make toward being more independent and self-reliant are not without stumbles.  I try to keep my camera {and a sense of humor} handy through the good...


And the 'bad'...


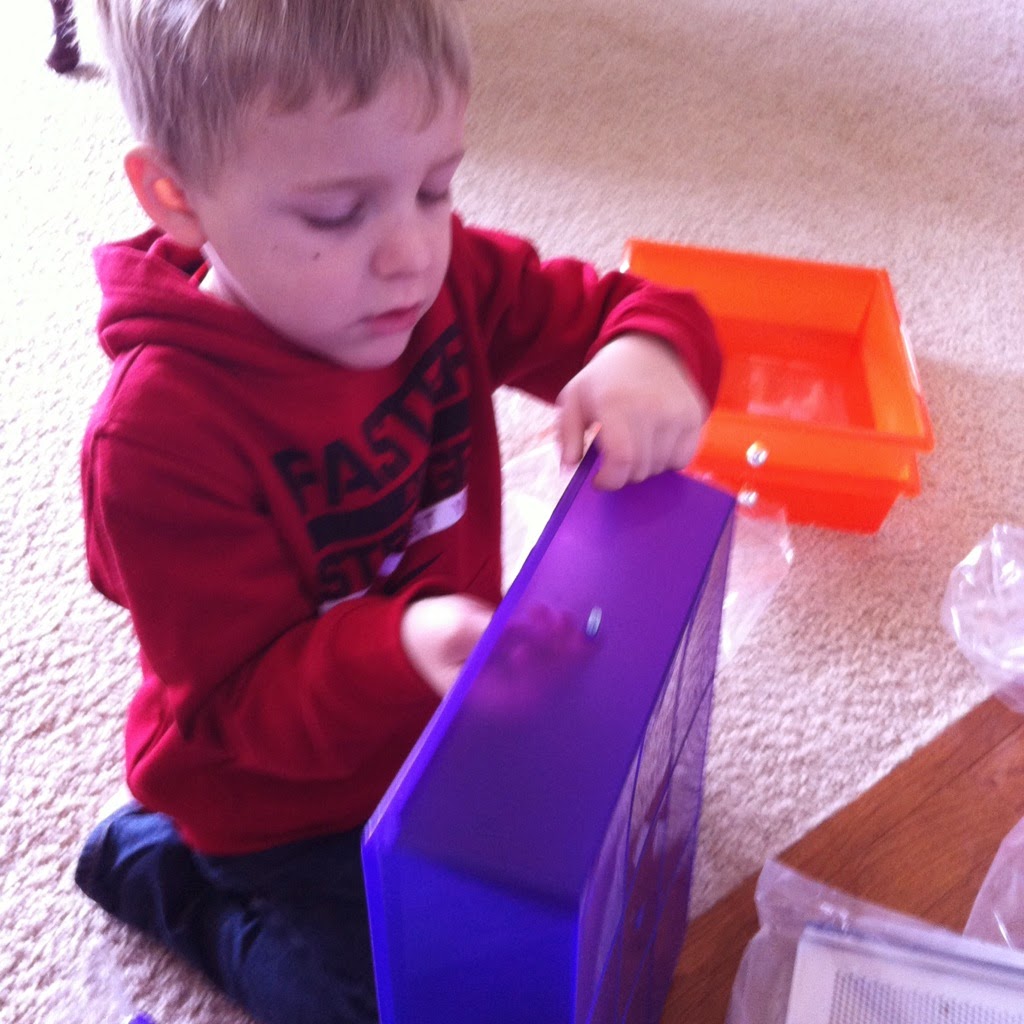
Most recently our son is learning his independence in the bathroom.  And, after it taking what seems like forever to get him potty trained, I'm not about to discourage him.  Even when he uses a little too much toilet paper and overflows the toilet.
Yeah..... And, FYI, it does no good to take the top off the tank and try to control the flow of water.  {Kevin got a good laugh out of that bit reasoning.}

Fortunately, I had just cleaned the toilet prior to this little incident, so it wasn't too much of an ick factor.  However, I wasn't just going to walk away without making sure everything was good and clean after this little incident.

Enter my heavy hitter - Basic G {Germicide}!
This baby disinfects, cleans and deodorizes all in one step.  And, it's so concentrated that one quart makes up to 64 gallons.

Basic G is now my go to cleaner when I need to get rid of bacteria, viruses, and fungi in my home.  It's nontoxic and safe to use all around the house - on door knobs, light switches, in the bathroom and kitchen, sinks and floors, on stainless steel and aluminum, and on hard non-porous surfaces.  We even use it to keep our large outdoor trash can clean and free of stink.  The residual effectiveness lasts up to three days after application (verse only one hour when using chlorine bleach) and it kills 32 pathogens (verses only 8 when using Lysol).

Using Basic G has helped me to know my house is clean.  It gives me a way to clean up after our little steps toward independence and a peace of mind and I have one less thing to worry about when it comes to the health of our family and especially our kids.

Want to give Basic G a try?  Go on over to my website and order yours today.  Shaklee has a 30 day money back guarantee on all their products.  I love having this in my cleaning arsenal, though, and know you will too!  Shaklee even makes Basic G Wipes in their Get Clean Line for quick cleaning convenience.  And, once done cleaning, the wipes are recyclable.

Feel free to contact me with any questions!  I love helping others discover a better, nontoxic way to clean.  Just send me an email or message me on my Facebook page.

Have a wonderful week!

Wednesday, July 2, 2014

Painting Tips & Tricks: Clean it Up

The final step in your painting project is going to be cleaning it all up so you can enjoy your new prettied up space.  There are a couple of things you can do along the way to make the end job easier.

1.  Keep a rag handy for those little oops's that happen along the way.  I know some people like to have a dry rag and others who say have a wet or damp rag.  I think it's a personal preference.  Me? I use my shirt.  Why?  There is a lot of space I can use to clean with and it is always with me as I go around the room.  I'm already looking for all my other tools, keeping track of a rag is not something I want to do.
These are a couple of camp shirts I've had since high school.  As you can see, I've had to clean up a few times over the years of painting.  I either wrap my finger in the material and wipe the area that needs cleaning or I use my finger and then wipe it on the shirt.  For me, it works.

 2.  Learn what NEEDS to be cleaned up right away and what can wait.  Drips on hard flooring can often times be left to dry and clean up later.  Just make sure they are out of the way and not in a place that will be tracked.  After that little drip has dried, just scrape it up gently with your fingernail.  If the drip gets smeared or is in the middle of your space, go ahead and clean it up.

Before

After

When final clean up time rolls around, it doesn't have to be a big production.   This can actually be done very easily.  Here are a couple ideas to help you get to the point of finally being able to put your feet up and relax after a job well done.

1.  Remember latex paint is water based and your paint brush can be cleaned almost all the way using just water.  For the last little bit, use a gentle cleaner.  My Dish Wash is gentle on everything except the dirt I need to get rid of.

 Honestly, I can't believe my favorite brush came clean.  Please remember to clean your brush soon after finishing your project.  I ended up waiting a month and thought I was going to have to throw the brush in the trash.  So glad Shaklee works!

2.  Don't worry about cleaning out your paint tray immediately.  If you have the time, just set the tray to the side somewhere and let it dry.  Once it's dry, the paint can just be peeled up with very little effort.  Even better.  Hand the tray off to one of your kids and let them do the job.  My kids actually fight over who gets the privilege {ahem} of peeling the paint.
3.  While I don't have a picture of this, I think you will get the point of this last idea.  Just go ahead and throw the paint roller in the trash.  Yep.  Just toss it.  New rollers aren't that expensive and it's a lot of effort for not a lot of return.

Those are my little pearls of wisdom.  Let me know what helped you and any ideas you have that would help me and others.  I'm always looking for great tips and tricks to use in my life.

Want to read the other Painting Tips & Tricks posts?  Here are the links to all of them!
Prepping Your Space
Protect Your Throne
Put it Under Wraps


Related Posts Plugin for WordPress, Blogger...