Last week I asked which valence people preferred.
Valence 1
Or Valence 2
Honestly, I already had a favorite, but I guess I just needed confirmation on my decision. Valence 2 was the overwhelming favorite of those who let me know which they preferred. Yay! That's the one I wanted!
This is a quick sketch of my measurements I decided on for the finished product.
I like to sew, but I wanted to do this project as a 'No Sew' project. That way even those who don't like to sew, or can't sew, can do this valence.
First thing you will need to do is gather all your supplies.
- Material
- Iron and ironing board
- Fabric pen (chalk works too)
- Pins (for holding fabric in place)
- Fusible bonding web
- Spray bottle and press cloth
- Straight edge
- Velcro or something similar
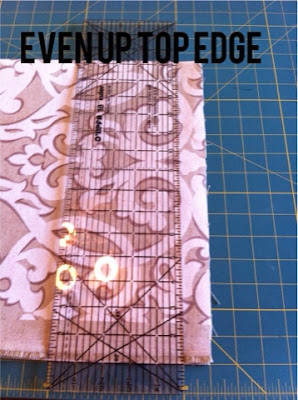
Starting with my printed fabric, I needed to make sure I had a straight edge on the top. Especially since my fabric had a definite pattern that could have turned out wonky very easily.
Next, finding center was important. 1. For the pattern and 2. To make sure it would be long enough to cover the width of the window.
Once both pieces are cut out, it's time to put it all together. I used Fusible Bonding Web 5/8th" wide to do all the seams and to 'sew' the fabric together.
Follow the directions on the back of the package. This will ensure you don't scorch your fabrics and that the bond holds properly. First seams to press are the point of the top fabric.
Next, put put the two fabrics together in the proper position and pin in place.
Once it's positioned and pinned, bond the two fabrics together along the point edge.
The back will sag if left unattached at the top edge. Looking back, I should have had the solid fabric go all the way up to the top seam of the decorative fabric. Something I'll do differently next time, but didn't have enough fabric to correct it this time.
Next, I did a quick hem along the top of the valence. Try to keep this as straight as possible so it will look right when you hang it on your window.
Now, do the same for the bottom hem and sides.
The next steps will be a little different for everyone depending on how you will hang the valence. I have a decorative piece that snaps on to the front of the blinds that are already installed in the window.
Attach the top of the valence to the blind cover with self adhesive hook and loop. I had a moment of panic when all I could find was sew on, but I just had to dig a little deeper in my stash of supplies to find the right stuff. {Phew!!}
Last step is to snap it in place and just stand and look at your finished project!
I love the way this looks in the room and dresses up the space! I'm trying to get my home to look like it actually has a family living in it. It's taken me a while, but after almost six years it's about time. Hopefully, now that I've started we won't be selling anytime soon.
Next step is to mark your lines. If you don't want to purchase a fabric pen, white school chalk works just as well. It can be found in the kids' art section at Walmart for less than a dollar.
I decided to mark the actual dimensions for the finished valence on the fabric. I then went back and marked the seam allowance lines. This just helped me keep everything in order in my mind. (I have so many distractions and interruptions, I have to do projects in a way that I don't have to think to hard about what I've already done.)
Next step is to cut out the top piece along the seam allowance lines.
Now that the top decorative piece is cut out, go back and mark and cut out your bottom fabric.
Your next step will be to add a liner. I didn't plan on this when I first started. Fortunately, I had enough of an other material left over from previous project that was big enough. I just laid the liner fabric on the the back of the valence, pinned it in place and then cut the liner fabric about 1/2 inch smaller than the valence front. Last step to this part was to fuse the top edge together.
Here is what I did.
The middle of your valence needs to line up with the middle of your window. Find the middle and mark on both.
I love the way this looks in the room and dresses up the space! I'm trying to get my home to look like it actually has a family living in it. It's taken me a while, but after almost six years it's about time. Hopefully, now that I've started we won't be selling anytime soon.
Let me know what you think! If you have any questions, I'll be happy to try and help. Just contact me through Facebook or email. This really was an easy project. The biggest time spent was in the planning and getting all the measurements right.
Ok. Now on to the next project!


No comments:
Post a Comment